Chocolate Peppermint Cookies

Mmmm...chocolate and peppermint.  An excellent pairing any time of the year, but especially perfect for Christmas baking.  Thanks to Caroline at the G-Spot for hosting this months ratio rally.  You can check out the bottom of my post for links to all the fabulous gluten free cookies created by ratio this month.

Ruhlman's ratio for cookies is 3:2:1 of flour:sugar:fat, but this produces a shortbread type cookie and I wanted to do a drop cookie.  Ruhlman suggests a ratio of 1:1:1 for drop cookies.  I was a little skeptical.  1:1:1 seemed like a lot of sugar and fat and I don't like cookies that leave a fatty film on the roof of my mouth (even if they taste good).  Since I am new to baking by weight, I decided to figure out the ratio for my favorite chocolate chip cookies and see how they compare to Ruhlman's.  It turns out that Ruhlman knows what he's talking about (surprise, surprise).  Shame on me for doubting!  My chocolate chip cookies have slightly more sugar and a tad less fat than the 1:1:1 ratio, but they were pretty close.  For these chocolate peppermint beauties I decided to compromise and do a 1:1:2/3 (or 3:3:2) of flour:sugar:fat.  To make chocolate cookies I used cocoa powder as part of my flour mix and I chose to use shortening as the fat because I didn't want a flat cookie.  You'll notice that there isn't any peppermint in the cookie.  My husband is not a fan so I only added peppermint to the frosting.  You could certainly add a bit to the cookie dough if you'd like.  These cookies have a slightly crunchy edge and a soft center.  They are delicious frosted or plain and would be fantastic with any kind of chip added in.  They'd also be really good if you sandwiched the frosting between 2 cookies.   I don't know how they are the next day - we ate them all within a couple of hours!

Gluten Free Chocolate Peppermint Cookies
yield: 15-20 cookies

100 grams brown sugar
66 grams shortening
1 large egg
1 teaspoon vanilla
75 grams gluten free flour mix
25 grams cocoa powder
1/2 teaspoon baking powder
1/4 teaspoon guar gum
1/4 teaspoon salt

Preheat oven to 350 degrees Fahrenheit.  Cream the sugar and shortening together.  Add the egg and mix until well incorporated.  Add vanilla and mix.  Slowly add in the dry ingredients and mix until well combined.  Drop dough by tablespoon onto an ungreased baking sheet.  I used a small (2 teaspoon) cookie scoop so they'd be the same size.  Bake for 10-11 minutes.  Remove from baking sheet and cool before frosting.

Please forgive me for not weighing the frosting.  My 2 year-old was helping and I got distracted trying to keep the ingredients inside the mixing bowl...

Peppermint Frosting
1 cup powdered sugar
3-4 teaspoons milk
1/4-1/2 teaspoon peppermint extract (less if using oil)
Crushed candy cane for decorating

Combine powdered sugar, half of the milk and half of the peppermint extract in a mixing bowl.  Give it a little taste to see if you need more peppermint.  Add a drop of food coloring if desired.  Mix well.  Add milk 1 teaspoon at a time until you get the consistency you like.

Frost cooled cookies and sprinkle with crushed candy cane.  Allow the frosting to set (about 5 minutes) and enjoy!

Amanda | Gluten Free Maui | Simple Shortbread
Amie Valpone | The Healthy Apple | Grapefruit Sugar Cookies
Brooke | B & the boy! | Candy Cane Shortbread
Caleigh | Gluten Free[k] | Mulled Spice Cookies
Caneel | Mama Me Gluten Free | Cardamom Date Cookies
charissa | zest bakery | Coconut Peanut Butter Chocolate Chip Cookies
Caroline | The G-Spot | Double Chocolate Chip Peppermint Cookies
Claire | Gluten Freedom | Chai Latte Cashew Cookies
Erin | The Sensitive Epicure | Spritz Cookies with Jam
gretchen | kumquat | Classic Sugar Cookies
Irvin | Eat the Love | Apple Brown Butter Bay Leaf Spice Cookies
Jean | Gluten Free Doctor Recipes | Reindeer Cookies
Jenn | Jenn Cuisine | Basler Brunsli
Jonathan| The Canary Files | Vegan Salted Oatmeal Cherry Cookies
Karen | Cooking Gluten Free! | Mexican Wedding Cakes
Lisa from Gluten Free Canteen | Molasses Rum Raisin Cookies
Mary Fran | frannycakes | Pinwheel Cookies
Meaghan | The Wicked Good Vegan | Vegan Chocolate Chip Cookies
Morri | Meals With Morri| Stevia & Grain-Free Thumbprint Cookies with Apricot Preserves
Pete & Kelli | No Gluten, No Problem| Belgian Speculaas Cookies
Rachel | The Crispy Cook | Melomakarona
Silvana Nardone | Silvana's Kitchen | Old-School Italian Jam-Filled Hazelnut Cookies
Shauna / Gluten Free Girl / Soft Molasses Cookies
T.R. | No One Likes Crumbley Cookies | Cinnamon Lemon Cookies
Tara | A Baking Life | Walnut Shortbread

Blueberry Pie


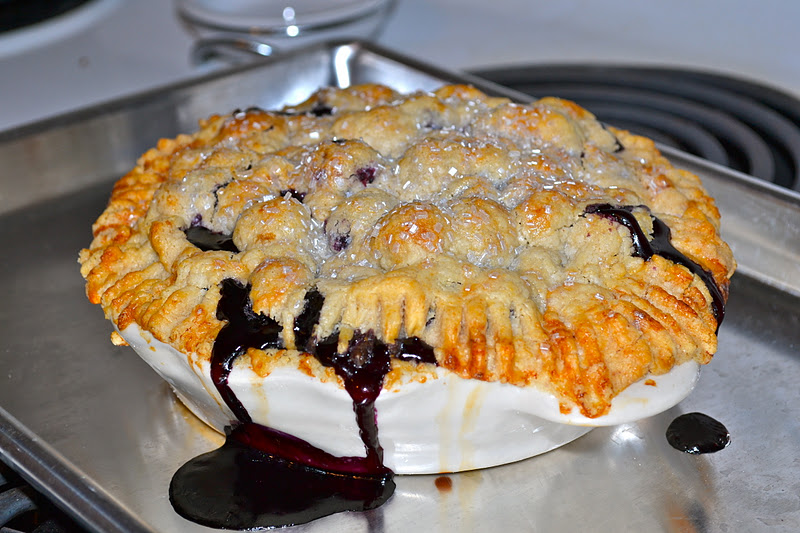
I've been looking forward to the pie ratio rally for months!  Pie has always been scary for me and I was determined to find a delicious and flaky crust that I could come back to year after year.  I also found a great deal on a Cuisinart food processor and was excited to incorporate it into my pie making routine.  I experimented with 3 different flour combinations and found one that I absolutely love.  Yeah!!!  I want to say that trial and error led to my pie success, but it was probably the food processor!

The pie crust ratio is 3-2-1 (flour-fat-water).  And once you find a great crust there's nothing stopping you from creating just about any kind of pie you can dream up.  The only negative is that an 8 or 9 inch pie is too much for our family.  We usually only eat half of the pie.  Enter the 6 inch pie dish.  When working with ratios you can easily scale a recipe to fit your needs.  Now I've got a recipe that is the perfect size for our family.  I'll be making pie year round!

This pie is for a double crust 6 inch pie plate.  If you'd like to make it to fit a 9 inch dish multiply everything by 3.

Gluten Free Blueberry Pie
6 inch pie

Crust:
40 grams gluten free oat flour
40 grams white rice flour
40 grams corn starch
40 grams cold shortening, cut into 1/2 inch pieces
40 grams frozen unsalted butter, cut into 1/2 inch pieces
40 grams ice water
1 teaspoon sugar
1/2 teaspoon salt

Combine flours, sugar and salt in a food processor and pulse until aerated.  Add shortening and butter and pulse 10 times or until mixture resembles course meal with a few larger pieces remaining. Slowly pour in the ice water and pulse 5 times or until the mixture just begins to come together. If mixture is dry add additional water 1 teaspoon at a time.

Divide dough in half, place on plastic wrap and form into a disk. Wrap each disk in the plastic wrap and freeze for 30 minutes.  Make filling (below).


Preheat oven to 450 degrees Fahrenheit.  Remove chilled dough from the freezer and let rest on the counter for a few minutes before rolling.  If it's been in the freezer longer than 30 minutes you'll need to let it thaw a bit longer before rolling.  Unwrap the disk from the plastic wrap but keep the disk on the plastic wrap while you roll.  Roll out dough to an 8-9 inch circle (about 1/8 on an inch thick) and place into your 6 inch pie plate.  If dough rips gently press it back together.  Fill the pie plate with the blueberry filling.  The filling will be higher than the pie plate and might start to spill over but when it cooks it will shrink so you want more than you think you'll need.  Roll out the 2nd dough disk just like the first and gently place it over the filling.  Fold it under the bottom crust and use a fork to crimp the edges. Cut a few slits in top of the crust to let out the steam. Brush the crust with a little cream and sprinkle with sugar crystals if desired. Refrigerate until firm, about 30 minutes.

Bake at 450 degrees Fahrenheit on the oven rack one notch lower than the middle for 20 minutes.  You'll probably want to bake it on a cookie sheet to avoid blueberry juice spilling in your oven.  Reduce heat to 350 degrees and bake for an additional 40 minutes.

Filling:
2 1/2 cups frozen blueberries
1 Tablespoon cornstarch
2 Tablespoon sugar
1 teaspoon lemon juice

Stir together until all of the blueberries are coated.  Place in bottom pie crust.


For links to more amazing gluten free pie recipe visit this months host Lisa over at Gluten Free Canteen.

Gluten Free 7UP Biscuits


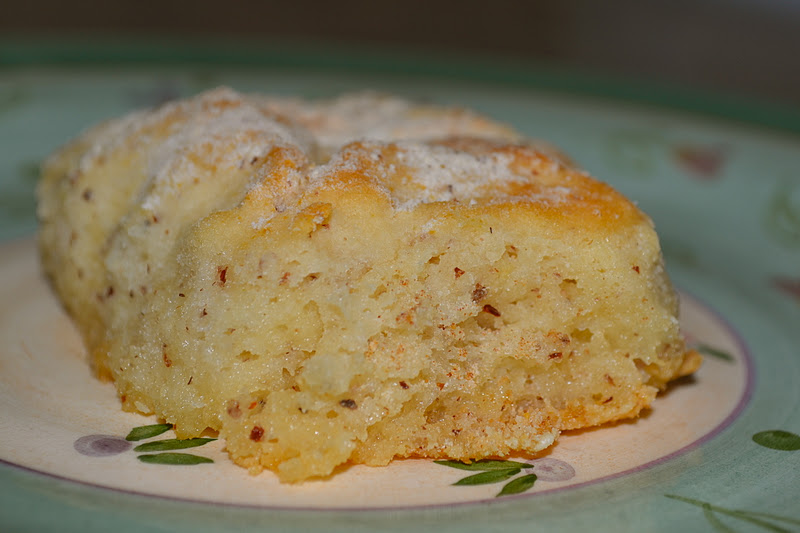
These soft biscuits are delicious and so simple.  You only need 4 ingredients including a gluten free baking mix.  I used Pamela's but you could use the gluten free baking mix of your choice.  We like them smothered with honey or homemade jam.

Gluten Free 7UP Biscuits

2 cups Pamela's gluten free Baking and Pancake Mix
1/2 cup sour cream
1/2 cup 7-up
1/4 cup butter

Preheat oven to 450 degrees Fahrenheit. Cut sour cream into Pamela's mix and stir in 7UP until just combined.  Dough will be sticky.  Flour your work surface with additional Pamela's mix and pat dough out to 3/4 inch thick.  Place butter in a 9 inch square (or round) pan and place in the preheated oven to melt the butter.  Cut into nine 2 inch circles (I used a drinking glass to cut them).  Remove pan with melted butter from the oven and place cut biscuit dough into the pan.  Return pan to the oven and bake for 15 minutes.  Serve warm with topping of your choice.

PIZZA! GF Ratio Rally

Making pizza by ratio has definitely been a learning experience for me.  I've made over 8 pizzas in the last 3 weeks (which is a lot for a family of 3) and I have yet to find a "perfect" gluten free pizza recipe.  That being said, I do have a go to recipe that is yummy and easy and for now that's good enough!   This month's rally was hosted by Karen of Cooking Gluten Free.  Check out her blog for the complete list of links to the delicious gluten free pizza recipes created for this months rally.

Here are some things I learned:
Ruhlman's Ratio- For Pizza Ruhlman's ratio is 5:3 of flour and liquid.  I tried this and it was a dismal failure.  The dough was heavy and dense and looked compressed and underbaked.  It felt like a rock in my stomach.  Gluten free flours need more liquid.  I figured out the ratio for my go to crust, the one I posted here and have been using ever since.  The ratio for this is 6:3:1 flour:liquid:egg  This ratio is close to Ruhlman's  but the addition of an egg adds the right amount of moisture to create a nice firm crust that you can pick up with your hands without being heavy and dense.  For the flour I found that I like a crust with more starch than my usual flour blend so I went with 50% high protein flour (brown rice, millet, soy) and 50% starch (tapioca, potato, corn)
          
I knew I had a crust I liked before I started the challenge, but I wanted a go to crust that didn't use eggs.   I tried a few more flour:water ratios including:
10:7 (dense and heavy)
19:16 (excellent)
8:7 (also excellent but I cheated and used an egg as part of the liquid)
1:1 (batter too thin)
Like I said, I learned a lot...there's nothing like a good failure to get the noggin thinking!

Even though I tried several ratios, my main focus really was more on technique.  I cooked my pizza at a hotter temperature (450 degrees Fahrenheit), I let it rise for an hour before rolling it between 2 pieces of parchment paper, and I pre-baked it on the rack with a hot pizza stone on the oven rack beneath it before adding the toppings.  All of these things, together with the 19:16 ratio made for a great crust.

19:16 sounds like a strange ratio, but if you multiply it by 10 grams you'll end up with an easy 18 inch pizza crust. Here's the Recipe:

Pizza Crust by Ratio
makes one 18 inch crust (or two 8 inch crusts)

190 grams gluten free flour
  • 95 grams high protein flour (I used equal parts of millet, sorghum and soy but play with this using flours you like or have on hand)
  • 95 grams starch (I used 70 grams tapioca and 25 grams potato starch)
160 grams warm water
1 Tablespoon yeast
1 Tablespoon sugar
2 teaspoons olive oil
1 1/2  teaspoons xanthan gum
1/2 teaspoon salt

Mix water with yeast and sugar and let proof for about 10 minutes or until nice and foamy.  Combine the remaining dry ingredients in a mixing bowl. Mix well. Add the yeast mixture and olive oil slowly to the dry ingredients and mix on low until the mixture is well incorporated. Increase the speed to high and continue to mix for 4 minutes.  The dough will be sticky.  Cover the dough with plastic wrap and let rise for about an hour or until doubled.

After an hour preheat the oven to 450 Degrees Fahrenheit and put a pizza stone on the bottom rack of the oven.  Place dough on a piece of parchment paper.  Spray a second piece of parchment paper and place it on top of the dough.  Use a rolling pin and with light pressure roll the dough to about an 1/8 inch thick (thicker if your prefer, but you'll need to adjust the baking times).  Remove the top parchment and slide the bottom parchment with the crust onto the oven rack.  Bake for 10-15 minutes or until the crust just begins to brown.  Remove crust from the oven and top with your favorite toppings.  Return the pizza to the oven for 10 more minutes or until the cheese is melted and crust is brown on the edges.  Enjoy!

Gluten Free Strawberry Cupcakes

Our baby girl turned two this month and requested cupcakes for her birthday.  She calls them "Happy Birthdays".  I love that.  She loves the color pink lately and strawberries are one of her favorite fruits, so strawberry cupcakes with strawberry cream cheese frosting was the only way to go!  My husband says these are the best cupcakes he's every had and probably his second favorite dessert behind Aunt Betty's Chocolate Cake.  They really are that good!

Gluten Free Strawberry Cupcakes

1/2 cup sugar
1/2 cup (3 oz package) gluten free strawberry jello mix
2 eggs
1 1/4 cups gluten free flour mix
1/4 teaspoon salt
1 1/2 teaspoons baking powder
1/2 teaspoon xanthan gum
1/2 cup oil
1/2 cup milk
1 teaspoon vanilla
4-6 strawberries; chopped and mashed or pureed to equal 1/2 cup

Preheat oven to 350 degrees Fahrenheit and line a muffin pan(s) with 12-15 cupcake papers.  In a large mixing bowl beat sugar, jello and eggs at medium speed for 1 minute.  Add the rest of the ingredients and mix on medium speed for 1 minute.  Pour batter into the pans dividing evenly and filling each cupcake 2/3 full.  I like to use my 1 1/2 Tablespoon cookie scoop and put 2 scoops of batter in each cupcake liner.  Bake cupcakes in preheated oven for 20 minutes or until toothpick inserted into the middle of cupcake comes out clean.  Let cupcakes cool for a few minutes and then remove them from the pan to finish cooling.  Frost cooled cupcakes with Strawberry Cream Cheese Frosting. (below)

**I never frost all of my cupcakes.  Instead I put half of them in the freezer, unfrosted and I store the extra frosting in the fridge.  Whenever we want cupcakes I grab a few out of the freezer along with the frosting from the fridge.  The cupcakes thaw on the counter within 20 minutes or 15 seconds in the microwave.  Just frost and enjoy.  Fresh cupcakes every day for a week (less in our house)! 

Strawberry Cream Cheese Frosting

2 ounces cream cheese, softened to room temperature
2 Tablespoons butter, softened to room temperature
1 strawberry, chopped & mashed or pureed (1-2 Tablespoons)
2 cups powdered sugar
1/2 teaspoon lemon juice (optional)
milk if needed

Place cream cheese, butter and pureed strawberry in a mixing bowl and beat until combined. Mix in the lemon juice (optional but brightens up the flavor).  Add the powdered sugar and mix on low until combined then turn mixer to high and beat for 1-2 minutes until frosting is light and creamy.  Check the frosting's spreading consistency at this time.  Cream cheese frosting tends to be on the soft side so you probably won't need any additional liquid.  If the spreading consistency is too stiff mix in some milk 1 teaspoon at a time checking spreading consistency after each addition.  Store frosting in the refrigerator until ready to use. 

**The strawberry makes the frosting a pale pink.  I added a little food coloring to make it brighter.


Strawberry "Happy Birthdays"